Input Mappings & Action Maps(Mainly UE5)
I’m going to explain this as clearly and "on the job" as I can. In the modern Unreal workflow (Enhanced Input), your controls are broken down into a hierarchy.
The Hierarchy
- Input Actions (IA): These are the individual "verbs" (e.g., Move, Jump, Shoot).
- Input Mapping Context (IMC): This is the collection of those verbs. You can have as many Input Actions as you need in your Mapping Context.
Practical Example: Top-Down Movement
I like to break my inputs into movement directions or logic groups. Since I’m working on a top-down game, we only have 2D movement (Up/Down and Left/Right).
I created individual Input Actions for these, and then a single Input Mapping Context to join them together. This is what actually gets added to the player.
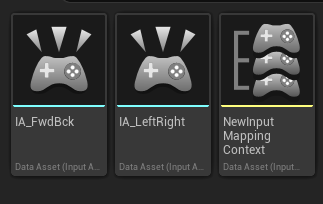
In the image above:
- IA_: These are the specific Input Action assets for Left/Right and Up/Down.
- IMC_: This is the Mapping Context asset. This is where you tell Unreal: "When I press 'W', trigger the 'Up' Input Action."(I didn't do this but mine would be IMC_Player)
How do it in CPP
I normally just use BPs for this, but sometimes I got back and do it in CPP for performance reasons.
Binding Enhanced Input in C++
To get your Top-Down movement working, you need to handle two things in your Character or Pawn class: Setup (assigning the assets) and Binding (linking the assets to logic).
1. The Header (.h)
We need to declare the pointers for our Input Actions and a function to handle the movement.
// Copyright (c) 2026 flushwhy. All Rights Reserved.

#pragma once

#include "CoreMinimal.h"
#include "GameFramework/Character.h"
#include "InputActionValue.h" // Required for the input data
#include "MyCharacter.generated.h"

UCLASS()
class MYPROJECT_API AMyCharacter : public ACharacter
{
    GENERATED_BODY()

public:
    AMyCharacter();

protected:
    virtual void BeginPlay() override;
    virtual void SetupPlayerInputComponent(class UInputComponent* PlayerInputComponent) override;

    /** Mapping Context for this character */
    UPROPERTY(EditAnywhere, Category = "Input")
    class UInputMappingContext* DefaultMappingContext;

    /** Input Action for Movement */
    UPROPERTY(EditAnywhere, Category = "Input")
    class UInputAction* MoveAction;

    /** Function to handle the actual movement logic */
    void Move(const FInputActionValue& Value);
};
2. The Implementation (.cpp)
This is where we check the "logic" and apply the movement. Note the use of CastChecked—this is a "fail-fast" C-style check to ensure the input system is actually what we expect.
#include "MyCharacter.h"
#include "EnhancedInputComponent.h"
#include "EnhancedInputSubsystems.h"

AMyCharacter::AMyCharacter()
{
    PrimaryActorTick.bCanEverTick = false; // Optimization: We don't need to tick for movement
}

void AMyCharacter::BeginPlay()
{
    Super::BeginPlay();

    // Add the Mapping Context to the local player
    if (APlayerController* PC = Cast<APlayerController>(GetController()))
    {
        if (UEnhancedInputLocalPlayerSubsystem* Subsystem = ULocalPlayer::GetSubsystem<UEnhancedInputLocalPlayerSubsystem>(PC->GetLocalPlayer()))
        {
            Subsystem->AddMappingContext(DefaultMappingContext, 0);
        }
    }
}

void AMyCharacter::SetupPlayerInputComponent(UInputComponent* PlayerInputComponent)
{
    // Cast the internal InputComponent to the Enhanced version
    if (UEnhancedInputComponent* EnhancedInputComponent = CastChecked<UEnhancedInputComponent>(PlayerInputComponent))
    {
        // Binding the "MoveAction" to our Move function
        // ETriggerEvent::Triggered is for "held" or "active" input
        EnhancedInputComponent->BindAction(MoveAction, ETriggerEvent::Triggered, this, &AMyCharacter::Move);
    }
}

void AMyCharacter::Move(const FInputActionValue& Value)
{
    // Since this is Top-Down, the value is likely a Vector2D (X and Y)
    FVector2D MovementVector = Value.Get<FVector2D>();

    if (Controller != nullptr)
    {
        // Apply movement on the X axis (Forward/Backward)
        AddMovementInputForwardVector, MovementVector.Y;

        // Apply movement on the Y axis (Right/Left)
        AddMovementInputRightVector, MovementVector.X;
    }
}
Why do it this way?
- Fail-Fast Casting: Using
CastCheckedinSetupPlayerInputComponentensures that if you haven't enabled the Enhanced Input plugin, the game crashes immediately in development rather than failing silently later. - Vector2D Logic: By using a single
Movefunction for both axes, you reduce the number of function calls and keep the math centralized. - No Ticking: Notice we kept
bCanEverTick = false. The movement is driven entirely by the input system's "Triggered" events, which is much more efficient than checking input state inside aTick()function.
A Note for Source Users
If you are working with the Engine Source, you can actually dig into UEnhancedInputComponent::BindAction to see how it stores these delegates in a TArray. If you have thousands of bindings, you’ll start to see why keeping these organized in Mapping Contexts (as discussed on the homepage) is vital for performance.